| Version 15 (modified by dac, 8 years ago) (diff) |
|---|
Converting raw digital camera images to TIFF
PhaseOne
- Open the iXCapture software on a Windows virtual machine
- If you don't already have a 'NERC-ARF-Export' recipe you will need to generate one:
- Export type is: TIFF, output profile is: Adobe RGB (1998), Bits: 16, Tile size: None, Compression: LZW
- Name prefix is: [Cam ID]_[Cam Date]_[IMG Counter]
- Recipe Name is: NERC-ARF-Export
- Style is: Default
- Set 'Save to folder' to the output directory. Note: If you don't set the output directory before selecting the raw images it will save the processed data in the last directory used.
- Select the input directory using 'Select images: folders', you need to be able to write to this so it is recommended you create a new directory and symlink the raw data files into this.
- Once images have finished importing select 'Start Process' to start the conversion.
Leica RCD105
- Open the Leica processing software (needs to run under Windows, normally on a virtual machine).
- Select the appropriate camera config (Parameters)
- RCD with SN030 is the loan instrument from Leica used in 2015 from day 234 onwards, select parameter CH39_030_060_027_RGB_20100128 (Please keep updated!)
- As of late 2009, this is CH39_021_060, for data collected from 260 in 2013 use CH39_070_060. 2014 we have the camera CH39_021 back.
- There may be updates to this as the camera is recalibrated
- At the start of 2010 the camera has been modified to use more of the CCD (in calibration - final images may still be the same size). We have a different calibration file for all data collected from start of 2010. (These are currently set up in the processing software. If data prior to 2010 needs to be re-processed then the calibration files will need to be changed and an older version of processing software installed.)
- Select the input files
- Typically this will be something like ~arsf/arsf_data/2009/flight_data/iceland/IPY09_11-2009_219_Helheim/leica/rcd/images
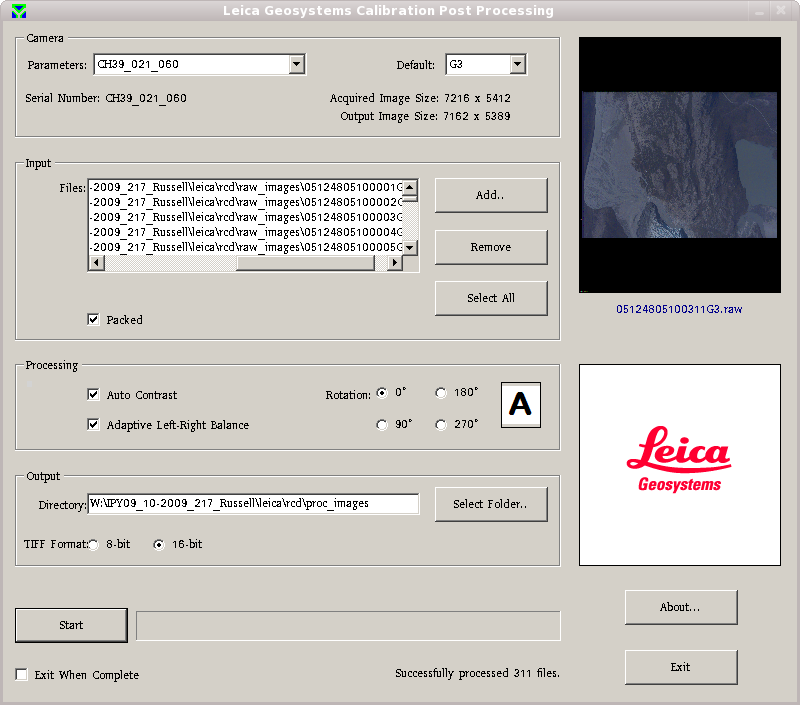
- Ensure both Auto Contrast and Adaptive Left-Right Balance are selected.
- Select the output directory
- Typically this will be something like ~arsf/arsf_data/2009/flight_data/iceland/IPY09_11-2009_219_Helheim/leica/rcd/proc_images
- Select 16 bit TIFF output (this is important! )
- Hit the start button and
go for coffeecontinue with other work (allow about 20-30secs per file)
Also it is possible to run more than one instance of the processing software, doing so on the windows machine will probably make it very slow but on a Windows VM with 2 processor cores assigned it runs quite happily.
A typical processing setup looks like:
