| Version 38 (modified by mark1, 16 years ago) (diff) |
|---|
Leica digital camera processing
The RCD produces raw files that need to be processed in order to create TIFF files. The processing basically uses a gain and offset scaling and (probably) corrects for lens distortion. See the RCD page for more details, including filename convention.
Raw to Tiff
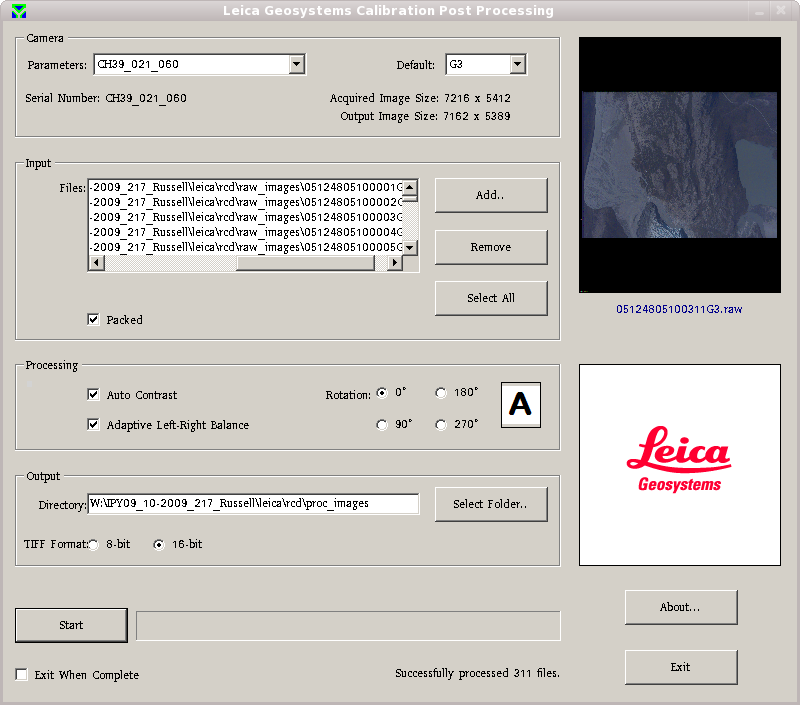
The first stage in processing the photographic data is to convert the raw file format into a 16-bit tiff format. The procedure for processing raw images to tif images can be found here.
Post-processing
When the tiffs have been created the next stages of the processing can be started. This incorporates:
- updating the photograph event file to subtract the frame grabbing time delay (0.006s) and update the real-time positional/navigation data to post-processed values from the IPAS SOL file.
- tagging the images with positional and navigational data as well as project information
- renaming the images to conform to ARSF standards
- generating thumbnail images of the tiffs.
For "perfect" projects this can all be done using one script which will generate a delivery directory and populate it with correctly processed data. Unfortunately a lot of projects are not perfect and may require a more hands on approach. A step by step procedure can be found here for post-processing data for problem projects.
To improve the chances of this single script approach working, follow the stages below to set up the data and remove as many anomalies as possible.
- Process the IPAS data and create a SOL file
- Create a KML file and view it in Google Earth.
- Run kmlise_project.py <main_project_dir> > kml_file.kml - this create a kml file using the !ImageEvents1.csv file
- Open the kml file in google earth
- Note which blocks of photographs do not overlap with any Eagle/Hawk data. Usually consists of a group of photographs at the start of the survey where they set up the exposure rates etc for the camera. Often the log sheet notes which images too.
- Delete these tif files (not the raws) since they are not required.
- Delete the kml file created above as it is no longer needed. An updated one will be created by the delivery script.
- Check the event log file for erroneous entries
- If there is no log file then this approach can not be used. See below section on tagging without log files.
- Anything with a -1 in GPS time will not be able to be tagged fully, but only with project information data. If possible, you might be able to use the SensorStats log file to estimate the GPS time of the erroneous events. Use the time differences in the log file to estimate the GPS time. Note down any image names you do this to so that it can be put in the Read Me. This is probably no longer worth doing - seems to be too imprecise
- Try running the script. Pipe the output to a text file in case you wish to review it afterwards.
- Create a KML file and view it in Google Earth.
Example command:
make_delivery_folder.sh -c -d ~airborne/workspace/project_dir -y 2010 -j 297 -p EX01_01 -a "Example Site" -e ~airborne/workspace/project_dir/leica/rcd/logs/ImageEvent1.csv -s ~airborne/workspace/project_dir/leica/ipas/proc/solfile.sol -n "PI Name" | tee camera_delivery.log
If the script fails then you will have to fix the problem and try again, or follow the individual stages listed here. Possible causes of failure, excluding the ones previously mentioned above, could be:
- SOL file GPS times do not overlap with photograph log file times. Either fix the SOL (if possible) else use the logfile to tag the images (and mention in the Read_Me)
Tagging the Images, creating thumbnails and delivery folder
Individual processing stages - if above script does not work
Tagging images which have camera log files
The eventfile needs to be updated before tagging the images. This will apply a 0.006s offset to the times in the csv and also replace the pos/nav data with post-processed data from a supplied SOL file. The resulting csv file will be written to new_eventfile.
image_events_file_fixer.py -v -t -s <solfile> <eventfile> <new_eventfile>
tag_tiffs.py is a python script that uses the exiftool command line tool too add tags to a tiff. It draws this data from an image event file (this should be the updated one from the above step). In addition to the data in the image event file the user can use several arguments to supplement the information. For information on the script use the -h option
tag_tiffs.py -V -d dd/mm/yyyy -p <projcode> -l <sitename> ( -s sortie ) <eventfile> <photographs_directory>
where:
dd/mm/yyyy is the date the image data was collected
sortie is the flight letter (e.g a, b, etc)
to check the changes use
exiftool /users/rsg/airborne/workspace/IPY09_11-2009_219_Helheim/leica/rcd/proc_images/07120958100001G4.tif
A second script is used to then rename the files with useful names containing the project code, year and day. this script also takes the image events file and the folder containing the images as arguments and renames the files and creates a new image events file with the file names updated.
for more information on the script use -h option
rename_photos_update_events_file.py -v -d dd/mm/yyyy -c <projcode> ( -s sortie ) <eventfile> <photographs_directory>
Tagging images which do not have camera log files
Only minimal tagging can be performed: original filename, project code, flight day and site name. This is because without the timestamp of the image event we cannot match up any navigation information. Ask mark1 for a clunky script to do this (will get updated to a better script soon).
Renaming the files can take place once they have been tagged with the original filename information. Ask mark1 for a clunky script to do this (will get updated to a better script soon).
Creating Thumbnails
We need to create thumbnail images for the delivery and for getting an overview of the images for the checking procedure. To do this use the photo2thumb.sh script.
Example:
photo2thumb.sh -d proc_images -o proc_thumbnails
Will create JPG thumbnails of all the TIF images in the proc_images directory and save them into a directory called thumbnails. For further usage run photo2thumb.sh -h
Subsequent processing
There are several other steps that could be undertaken:
- orthorectification (map the photos with respect to the ground/aircraft position)
- ? geocorrection (map the photos with respect to the ground + a DEM) - possibly only Bill's azgcorr mods could do this
- compositing orthorectified photos and seam-line adjustment
- compositing is easy, but will have ugly problems when you get different views on an object with vertical structure
- to improve the look of this, you have to manually edit the positioning of the joins - this is currently a very manual process and we do not currently have software for it
Attachments (1)
-
photo_processing_screenie.png
(92.3 KB) -
added by mggr 16 years ago.
Example processing screen
Download all attachments as: .zip