| Version 81 (modified by mark1, 12 years ago) (diff) |
|---|
Leica digital camera processing
The RCD produces raw files that need to be processed in order to create TIFF files. See the RCD page for instrument details, including filename convention.
Raw to Tiff
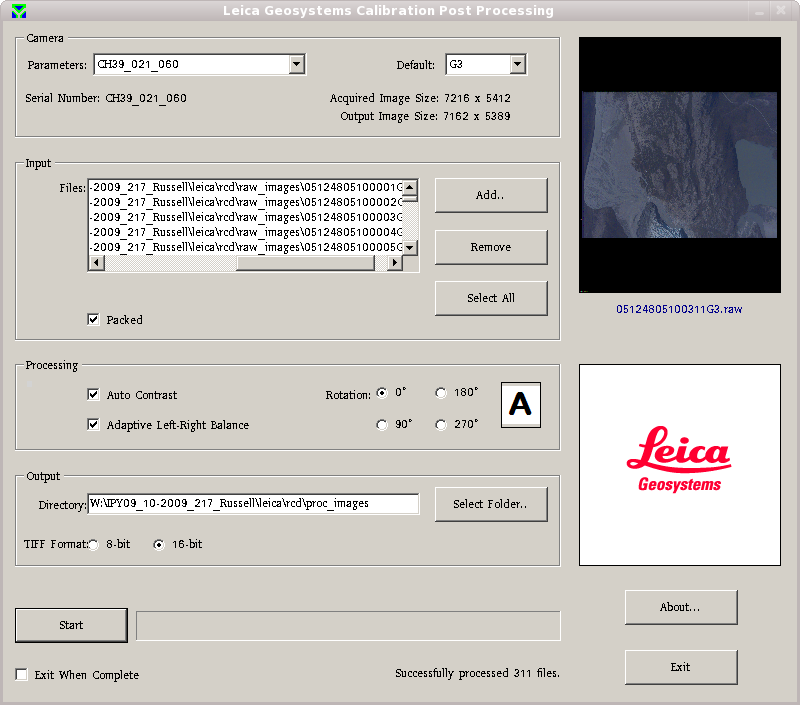
The first stage in processing the photographic data is to convert the raw file format into a 16-bit tiff format. The procedure for processing raw images to tif images can be found here.
Post-processing
- Get a camera .sol file
- Check there is a *_camera.sol file in the IPAS/proc directory. If there is not, then you will need to create one. See details here
- Remove "bad" images and images that don't correspond to flightlines.
- Run rcdimages_in_pdf.py from the rcd processing directory.
- Once all the thumbnails have been made and the pdf is opened look through it and remove all the over/under exposed tif images from proc_images (leave the raws). Any images that do not correspond to a flightline will be moved to proc_images/outbounds and any images with corrupted eventfile information will be moved to the proc_images/nogps. If the nogps directory was made remove any over/underexposed images then check which images are in the outbounds directory, and if any nogps images fall between the outbounds images remove the tif image. e.g. if images 1, 2, 3 and 6 are in outbounds the nogps images 4 and 5 will be outbound as well.
- Note down any images left in the nogps folder because these images will not be fully tagged and need to be mentioned in the Read Me, then move them into proc_images with the other tif files.
- Remove all images in the outbounds directory and remove the empty nogps and outbounds directories.
- Create a new image event file with post-processed positional data and omega,phi,kappa values
- Open IPAS CO (on the windows machine)
- Load in the *_camera.sol file and from rcd/logs the *!ImageEvents1.csv and *!PhotoId1.csv file
- Camera Orientation Direction: -90
- Event Offset: 0.006
- Output file as *!ImageEvents1-processed.csv, file format ASCII Output
- Check the event log file for erroneous entries
- If there is no log file then you will need to look here for information on tagging without log files.
- Anything with a -1 in GPS time will not be able to be tagged fully, but only with project information data. If possible, you might be able to use the SensorStats log file to estimate the GPS time of the erroneous events. Use the time differences in the log file to estimate the GPS time. Note down any image names you do this to so that it can be put in the Read Me. This is probably no longer worth doing - seems to be too imprecise
If a project is split into parts, with multiple navigation files, event files, etc; process each event file seperately using it's matching *_camera.sol file then combine the processed event files into one file. The flight line logs in /lidar/als50/logs/ also need to be combined into one file, as they're used to find the flight line names when creating the delivery readme.
Image Tagging
Image tagging inserts exiftags into the TIFF files that contain information such as: project details, camera parameters and photograph pos/att information.
This is scripted and can be run as follows.
Assuming a CSV file as output from IPASCO - the first thing to do is to fix the header in the csv file (space delimited file with spaces in the header names!):
rcd_tiff_tagging.py --eventfile <eventfilename> --fixipascoheader <fixedeventfilename>
This creates a new event file with a parseable header. Note that the DEFAULT header is HARD CODED in the script. If it is not the same as the below then you can call the function rcdclasses.FixIPASCOEventFileHeader(filename,newfilename,origheader,newheader) from within python to convert the origheader to the newheader.
Default header:
ID Event# GPS Time(s) Easting(degrees) Northing(degrees) Ell Ht(metres) Omega(deg) Phi(deg) Kap(deg) Lat(deg) Lon(deg) Xstd(m) Ystd(m) Zstd(m) Ostd(deg) Pstd(deg) Kstd(deg)
You are now ready to tag the tiffs. rcd_tiff_tagging.py has a lot of options to help in the tagging of images, but for usual tagging (i.e. in an ARSF repository porject) you (probably :) ) only need to specify the solfile, eventfile and project location. For other options see the --help. First run I suggest you do as the following:
rcd_tiff_tagging.py --eventfile <eventfilename> --solfile <solfilename> --projectlocation <toplevelprojectpath>
If that outputs everything OK (no errors etc) then add --final to the command to actually perform the tagging. Note also that the script can be loaded in as a library of functions, and the accompanying rcdclasses.py library is also of use here. This will also create an updated event file in the same directory as the photographs.
Making the Delivery
Now that the processing has been completed the delivery can be made. This, as with the hyperspectral and lidar, uses the arsf_delivery_library together with the convenience script make_arsf_delivery.py. An example usage:
make_arsf_delivery.py --projectlocation /users/rsg/arsf/arsf_data/2013/flight_data/uk/MYPROJECT --deliverytype camera --steps STRUCTURE
check that the output looks correct, and if so repeat with --final. This creates an empty structure. Then run:
make_arsf_delivery.py --projectlocation /users/rsg/arsf/arsf_data/2013/flight_data/uk/MYPROJECT --deliverytype camera --notsteps STRUCTURE
This will do a dry-run on the camera delivery and output information clearly labelled for each step. You can then proceed running a single step at a time if you so wish, or run the whole lot together.
Creating the Read me
- Run generate_readme_config.py with the -d option (giving the delivery directory) and "-r camera" as airborne.
- Edit the config (should be located in processing directory). Remember to add information on any photos which could not be tagged fully, or any images which look like they have anomalies or over/under exposure. To add new line characters enter '
'. Tagtype should be "full" if photos have been tagged with pos/att information or "min" if only tagged with project details. If both types are present in the delivery then use full and in the "data_quality_remarks" section add a sentence explaining which photos have been unable to be tagged with pos/att and why. Line_numbering should contain a space separated list of names/numbers identifying flight lines. - Create the LaTeX TeX file. To create the TeX file use the script create_latex_camera_readme.py with the -f option, giving the location of the config file generated above. This is editable in any text editor and can be manually edited to correct mistakes or insert new text
- Convert the TeX file into a PDF file. This is done using the command latex <TeXFile> and should create a file named Read_me-TODAYSDATE.pdf. It is advisable to keep the TeX file somewhere safe until after the delivery has been checked in case some changes to the Read_me need to be made (the TeX file should not be part of the delivery).
Subsequent processing ideas
There are several other steps that could be undertaken in the future:
- orthorectification (map the photos with respect to the ground/aircraft position)
- geocorrection (map the photos with respect to the ground + a DEM) - possibly only Bill's azgcorr mods could do this
- compositing orthorectified photos and seam-line adjustment
- compositing is easy, but will have ugly problems when you get different views on an object with vertical structure
- to improve the look of this, you have to manually edit the positioning of the joins - this is currently a very manual process and we do not currently have software for it
Attachments (1)
-
photo_processing_screenie.png
(92.3 KB) -
added by mggr 16 years ago.
Example processing screen
Download all attachments as: .zip