| Version 6 (modified by jaho, 14 years ago) (diff) |
|---|
AplGUI - Quick Start
AplGUI is a graphical user interface for Airborne Processing Library designed to simplify the process of geocorrection. The following step-by-step tutorial provides a concise description of creating level-3 geocorrected files from data delivered by Airborne Research and Survey Facility.
Installation
AplGUI comes in three versions: windows installer, windows standalone and source code. The latest release of the software can be downloaded from here(link). Windows installer requires administrator privileges on your machine and will automatically install the program in specified location and create a shortcut on the Desktop. The standalone version doesn't require installation and will work straight away after extracting from the archive. The source distribution is intended mainly for Linux users and requires Python and wxPython to be installed on the system.
To be able to get full functionality of AplGUI you are also going to need the latest version of APL and PROJ.4 library.
Setting up the Project
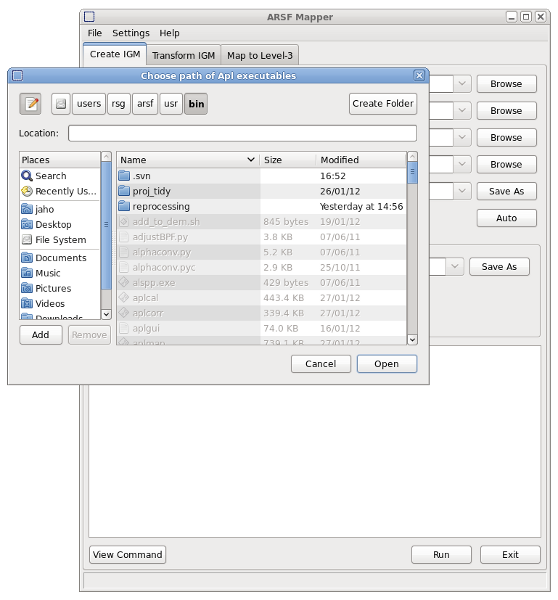
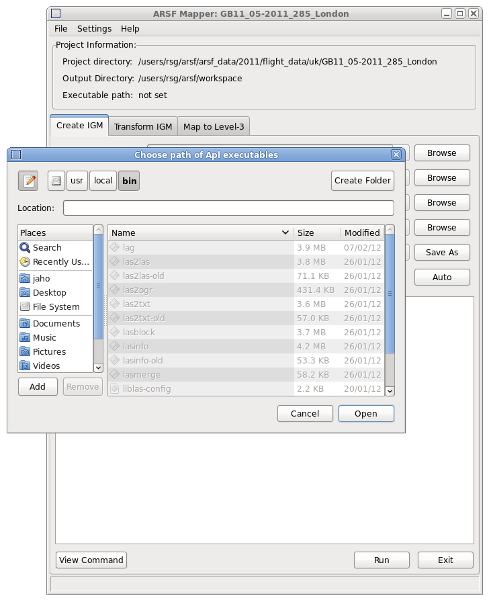
To set up a new project you first need to specify the location of APL files. Go to File menu, select Executable Path... and find the folder containing aplcorr, apltran and aplmap executables.

Select the folder with APL files.
Next you need to specify the location of the project directory, which is the folder containing your data. Again use File menu and select Project Directory... to specify the path to data files. The title of AplGUI window should now change to "ARSF Mapper: project_folder_name".
Optionally you can specify the output folder, where all the files produced by AplGUI will be put by default.
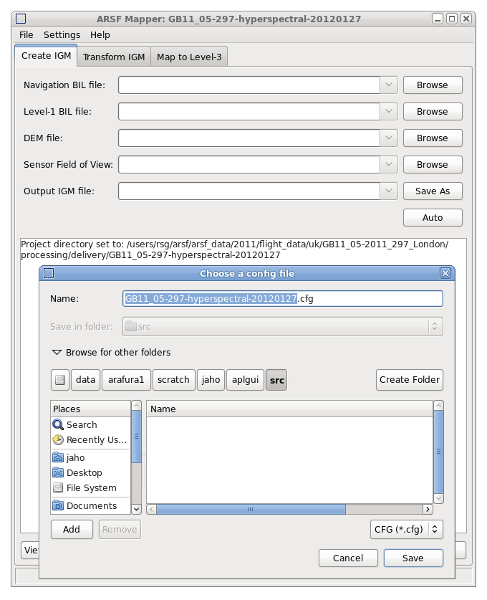
Once you are happy with your selections you can save the configuration to a file to avoid setting it again every time you start the program. Simply go to File menu > Save Settings and chose a file to store the configuration. You can also store settings for different projects in separate files. To load previously saved settings go to File > Load Settings.

Specify the file to store configuration for your project.
Creating an IGM file
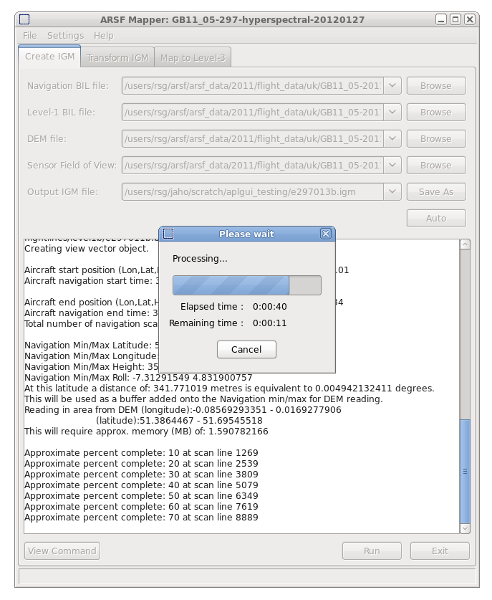
The first of three panels of AplGUI is used for creating level-3 IGM files from level-1 BIL files using aplcorr package. Simply click the Browse button next to Level-1 BIL file and select the file you wish to process from the list. Once this file has been selected you can press Auto button to automatically populate other fields on the panel with relevant entries.
Next click on Save As button next to Output IGM File and specify the name of the file that is about to be produced. Finally click the Run button at the bottom to start the processing. A dialog with progress bar will now pop up and the information about the processing will be displayed in the text box on the panel.

Creating IGM file.
Once the process is complete you can move on to the next step.
Reprojecting IGM geolocation information
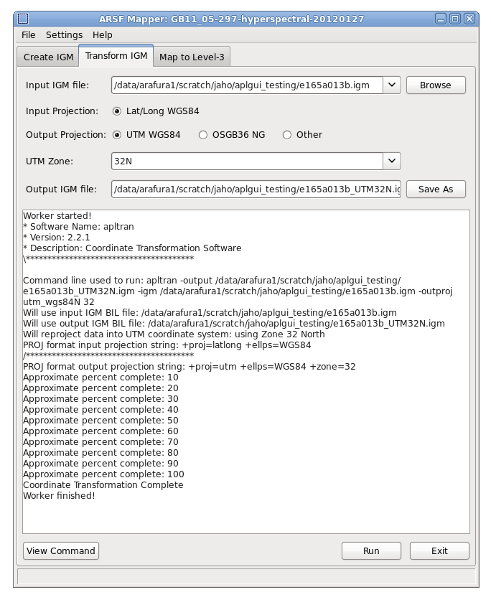
The IGM file produced in the previous step will be in geographic latitude/longitude. If you wish to transform this projection to something else you will need to use Transform IGM panel.

Transform IGM panel.
Click the Browse button next to Input IGM file to select the file or just copy and paste the path from Output IGM file on the previous panel. Next select desired output projection and output file name and press Run at the bottom again. Your transformed file should be ready within seconds.
Gridding and Mapping the Data
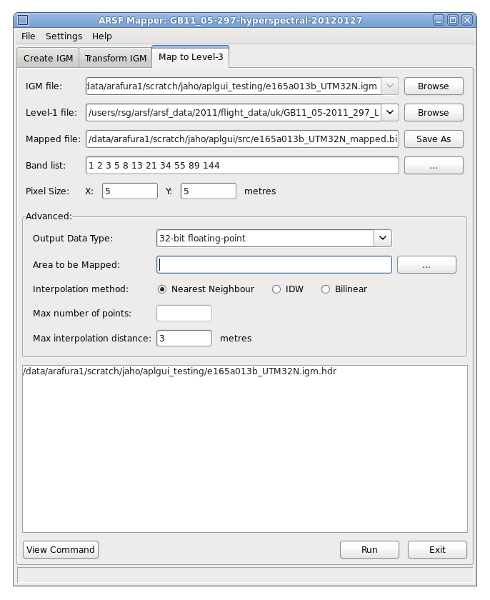
Now that you have an IGM file in the required projection it is time to map the level-1 data to a regular grid. You can use the third panel of AplGUI to create a map of level-1 data using projection of the IGM file.

Map panel with advanced options.
First select an IGM file produced with either first or the second panel of AplGUI, depending on the projection. Then select the corresponding level-1 file. Finally specify the name for the mapped output file. You will also have to select the bands to be mapped and the pixel size in relevant units, again based on the projection used. Optionally you can adjust some of the advanced settings, like output data type interpolation method or specify a particular are to be mapped.

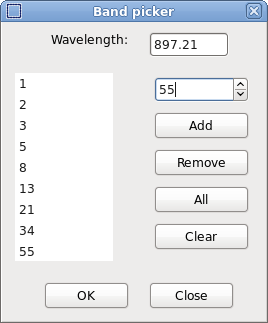
You can use a band picker dialog to select the bands to map.
Once you are happy with the settings press Run button to create the mapped level-3 file.
Further Information
For further information on advanced settings and processing details please refer to AplGUI integrated help and APL mapping user guide available at http://arsf-dan.nerc.ac.uk/trac/wiki/Downloads/doc.
Attachments (8)
-
snapshot1.png
(88.3 KB) -
added by jaho 14 years ago.
AplGUI - Choosing Executable Path
-
snapshot2.png
(79.8 KB) -
added by jaho 14 years ago.
AplGUI - Saving configuration
-
snapshot3.png
(134.0 KB) -
added by jaho 14 years ago.
AplGUI - Creating an IGM file
-
snapshot4.png
(122.4 KB) -
added by jaho 14 years ago.
AplGUI - Transform IGM panel
-
snapshot5.png
(16.1 KB) -
added by jaho 14 years ago.
AplGUI - band picker dialog
-
snapshot6.png
(66.2 KB) -
added by jaho 14 years ago.
AplGUI - Map panel with advanced options
-
snapshot7.png
(87.5 KB) -
added by jaho 14 years ago.
AplGUI - Project Information Panel
-
Screenshot11.png
(62.2 KB) -
added by jaho 14 years ago.
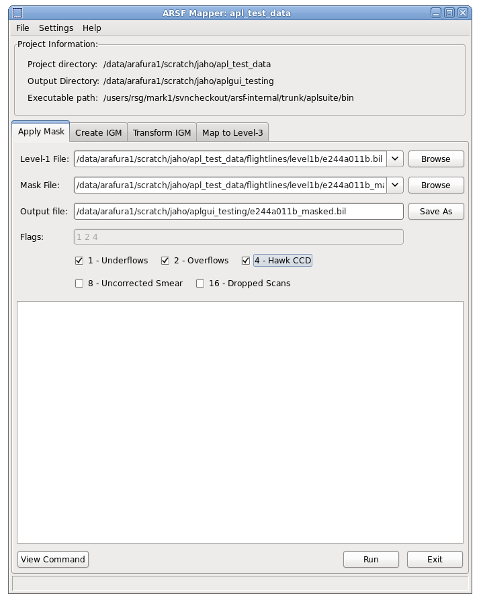
AplGUI - aplmask panel
Download all attachments as: .zip