| Version 4 (modified by jaho, 14 years ago) (diff) |
|---|
LAG User Guide [draft]
The following guide provides an overview of some of the LAG features and offers hints on how to utilize them for the best processing speed. Some of these are just convenient methods of doing things while other can offer a significant performance boost. Most of the values discussed below have been set up for the optimal performance by default, however different data sets and tasks can benefit from different configurations.
System Configuration
It is recommended that your system has at least 8GB of RAM for smooth LAG operation. It is also highly recommended that you have an SSD drive set up as the quadtree library used by LAG is heavily I/O bound, even more now with LAS 1.3 point format.
Opening Files

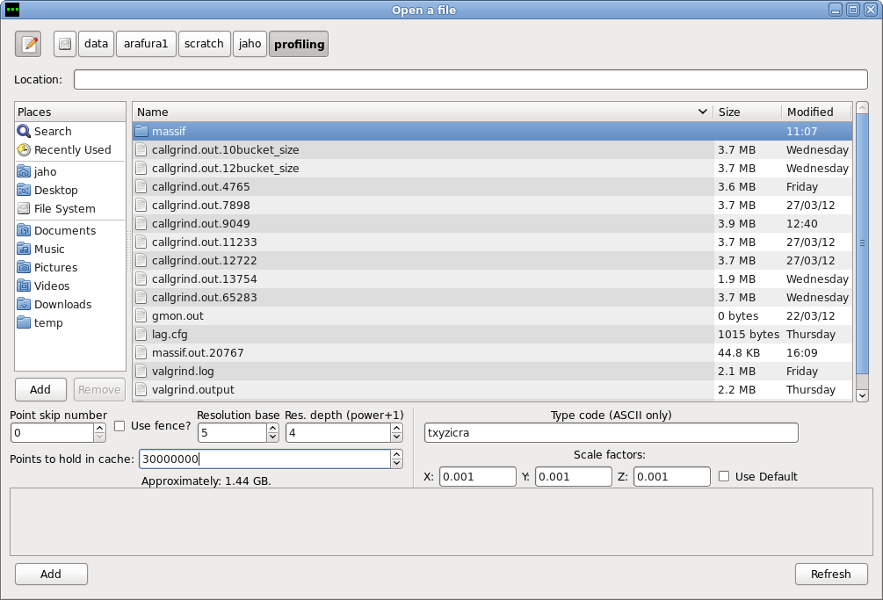
File opener dialog.
There are following options on the file opener dialog:
- Point Skip Number
This value determines how many points to skip before loading a point into memory. Thus a value of 2 will cause every third point to load, skipping two in between. Point skipping can dramatically improve both loading times and rendering of the data. It is not recommended for processing, but there is no reason not to use it for delivery checking. A value between 1 and 4 will still provide a fairly detailed overview of the flightlines, while offering a significant performance increase.
- Fence
Using the fence allows loading selected part of the flighline(s) into LAG. If there's only a small area in the data that you need to see in full detail, it is a good idea to load the whole data using point skipping, then select the area of interest with the fence in the overview window and click refresh on the file opener dialog after checking the Use Fence button.
- Resolution Base and Resolution Depth
These two values control the construction of the quadtree and directly affect both loading times and rendering speed of the data. Each leaf (point bucket) in the quadtree can have a number of sub-buckets which store points to display at different zoom level. For example when viewing a whole flightline in the overview window there is no need to render every single point or store all the points in memory at once. Thus sub-buckets containing every n-th point are used instead.
The Resolution Depth determines the number of sub-buckets for each bucket and Resolution Base determines the number of points at each level by specifying the interval between included points based on the formula of Resolution Base(Level - 1). For example the default values of 5 and 4 create 4 sub-buckets per bucket: one containing every point (50), second containing every 5th point (51), third containing every 25th point (52) and fourth with every 125th point (53).
Adjusting these values should be done carefully and based on the density, volume and coverage of the data. Generally increasing the Resolution Base and decreasing Resolution Depth will result in faster loading and quadtree operations (eg. classifying), but less smooth rendering. Creating more and denser sub-buckets may improve the interaction with the GUI but at the cost of slower quadtree and bigger memory footprint.
- Points to hold in cache
This determines the maximum number of points to hold in memory at any given time. Once this number is exceeded the points will be written to the hard drive which is much slower then RAM. This only concerns the quadtree and LAG is going to use much more together with OpenGL buffer and Gtk application. This value should be set roughly to 25% of you total available memory. Setting it too high will result in system memory swapping and setting it too low will result in quadtree uncaching data to hard drive. Note that points stored in memory are roughly 40% bigger then stored in the LAS files, so loading a 1GB file requires 1.4GB buffer.
- Ascii files
To load ascii files you need to provide the parse string that gives the order and number of columns in the ascii file and scale factors for x, y and z. The default laslib scale factors for text files are 0.01.
Panning
- Middle mouse button
Pressing middle mouse button (scroll wheel) can be used for moving the camera at any time also with profile/fence/ruler enabled and can be used instead of zooming in and out to change the view.
- WASD
The WASD cluster can be used for moving the camera as well. The move speed can be changed in Advanced Options window. Additionaly:
B, G - zooms in and out
X - toggles the profile
F - toggles the fence
T - switches between orthogonal and slanted
C - classifies selected points
Z - refresh
SPACE - loads currently selected profile into profile window

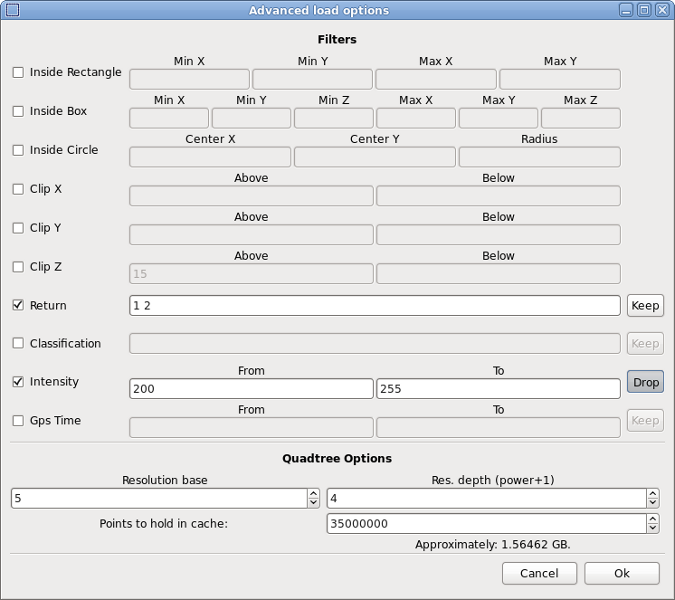
Advanced options dialog.
- Full refresh when panning
By default, when panning, rendered buckets are automatically refreshed every time a mouse button is released which may sometimes be slow. To disable this behaviour you can uncheck Full refresh when panning button in advanced options. This will make moving the camera much faster, but you'll have to manually refresh the view (by pressing Z) once you set the desired perspective.
- Detail level
These values determine how many points should be displayed at given zoom level. Eg. the lower the value for the main overview detail level, the faster LAG will start using the sparse sub-buckets to display the data when zooming out. In case of the profile the higher the value, the less detailed the data. Profile main detail level should generally be left at 0, as different values may result in inaccurate visualisation. Profile preview detail level determines how much of a profile is visible when panning.
Waveform Data
Attachments (3)
-
advopts.png
(111.4 KB) -
added by jaho 14 years ago.
LAG - Advanced Options
-
fileopener.png
(160.2 KB) -
added by jaho 14 years ago.
LAG - file opener
-
Screenshot-Advanced load options.png
(89.2 KB) -
added by jaho 14 years ago.
LAG - Advanced Load Dialog
Download all attachments as: .zip